Understanding Halide Pro+ Capture Format
2 min read
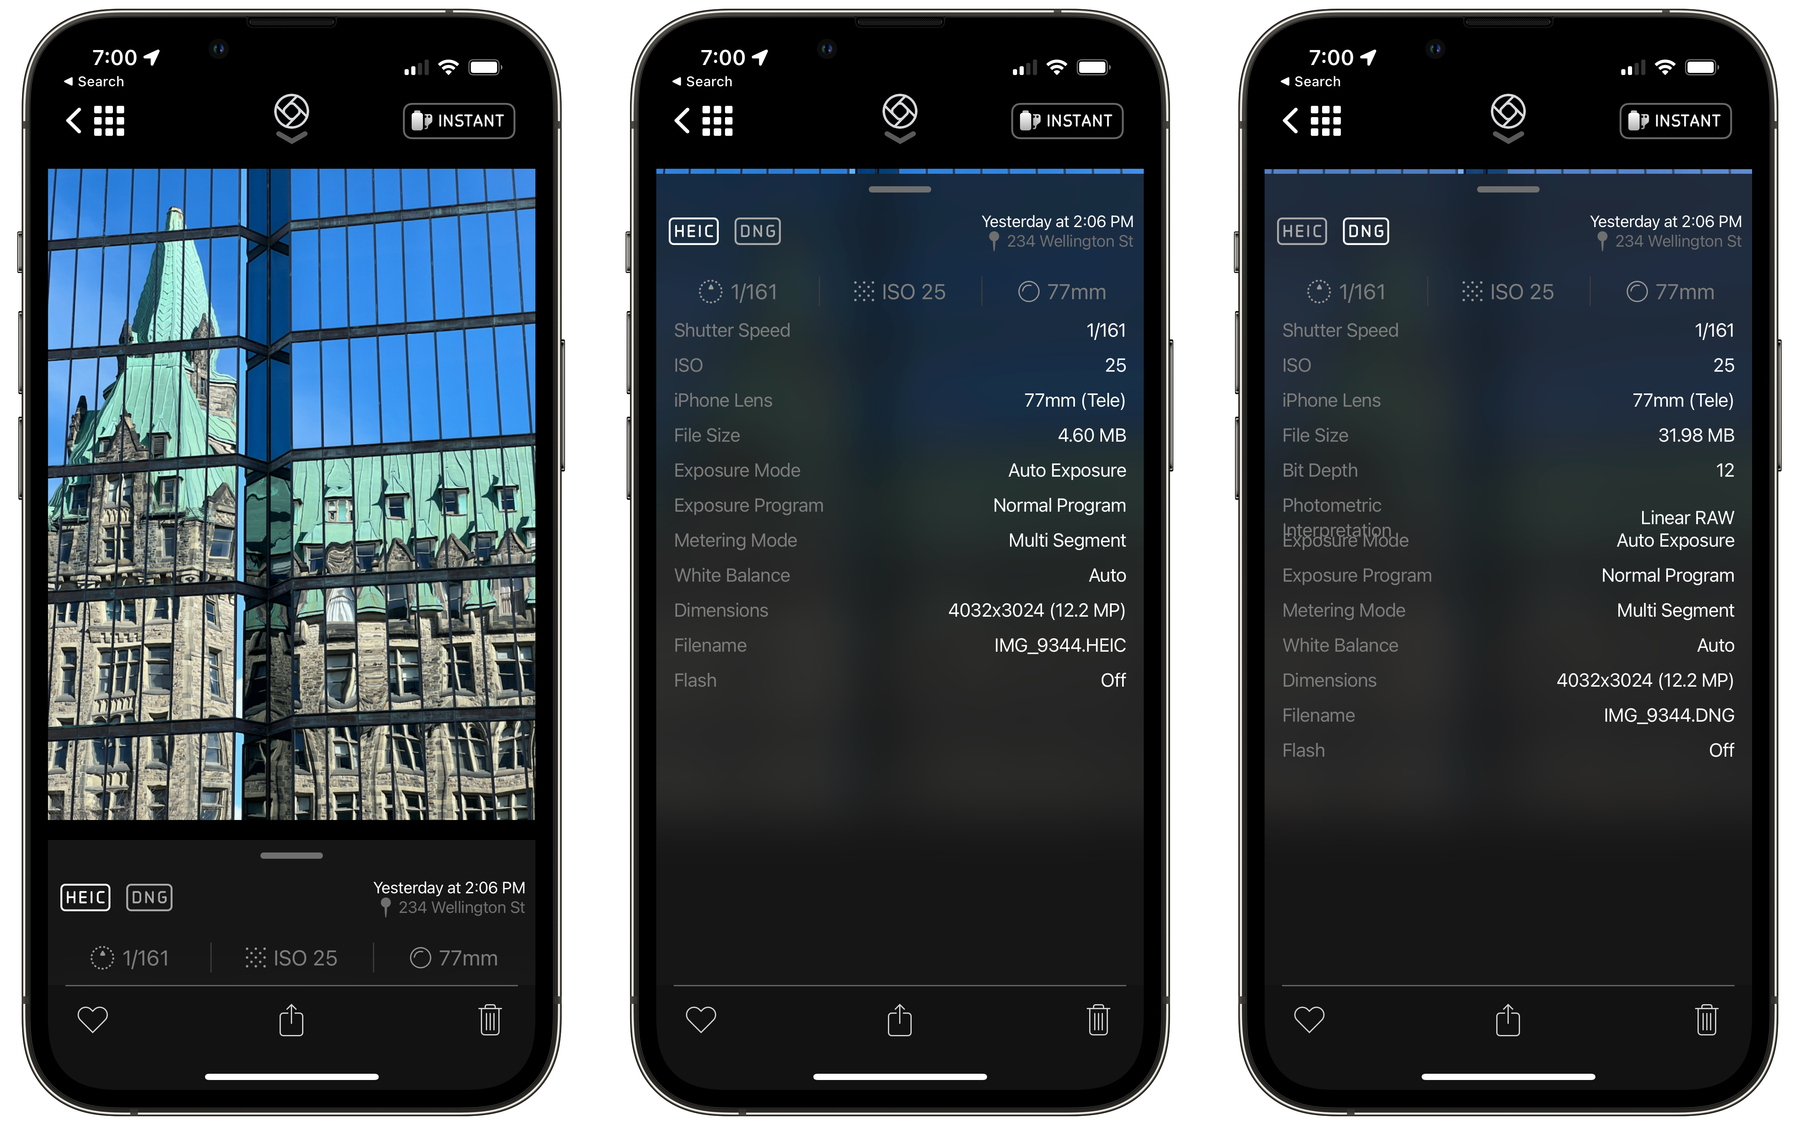
I’m still learning new things about shooting in ProRAW on my iPhone 13 Pro. The latest tidbits that I learned is not directly related to ProRAW usage, but to a setting in Halide related to photo capture modes.
When using what is called “Pro+” setting, Halide will take two photos for each shot. One is taken in HEIC format, the other is taken in ProRAW. Both photos are tied together and stored in Apple’s Photos library as one image. Here is the thing that I learned: when browsing previously taken photos from within Halide, metadata is shown in two different panels: HEIC and DNG (see above screenshots). Each component is taking a certain amount of space. The former being the smallest one. The latter, being the ProRAW version, is usually ten times bigger. But, when browsing the same photo in Photos, only the HEIC size is shown, as depicted in the following screenshot.
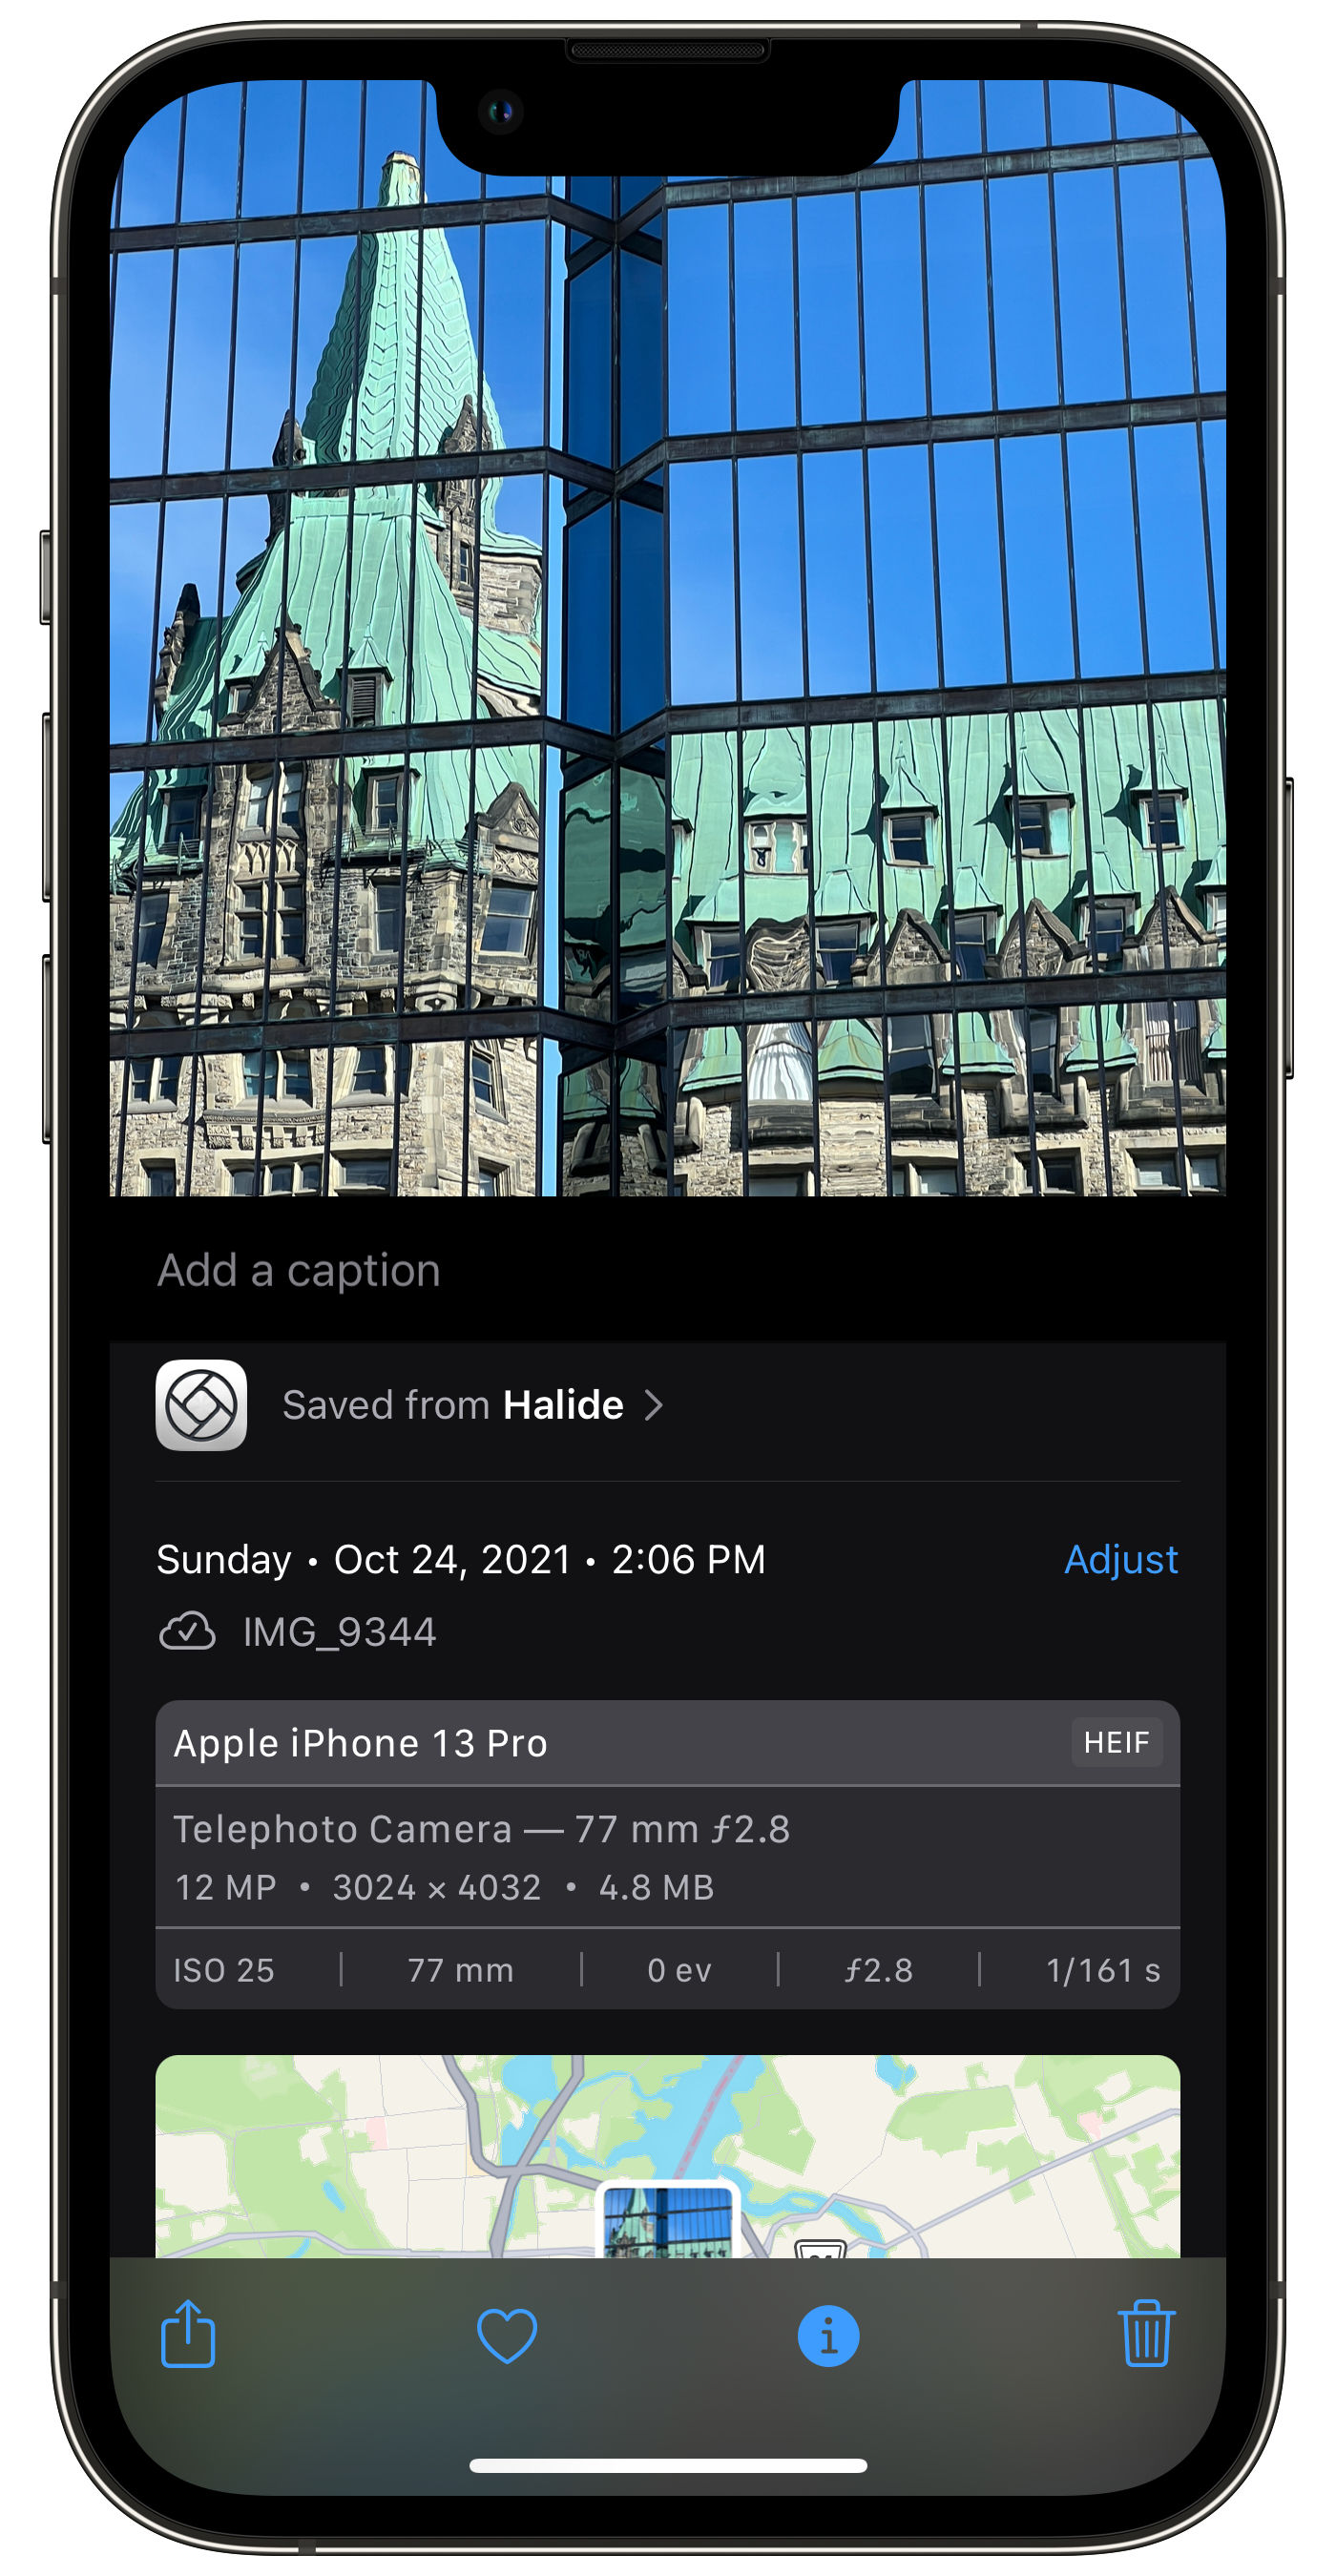
In summary, for pictures taken with Halide’s Pro+ format, don’t be deceived by Apple’s Photos showing only the HEIC size. The actual space consumed by this image is actually the sum of the HEIC part + ProRAW part (in DNG). That’s big, for only one image. Is it worth it? It depends, as I recently wrote about this.